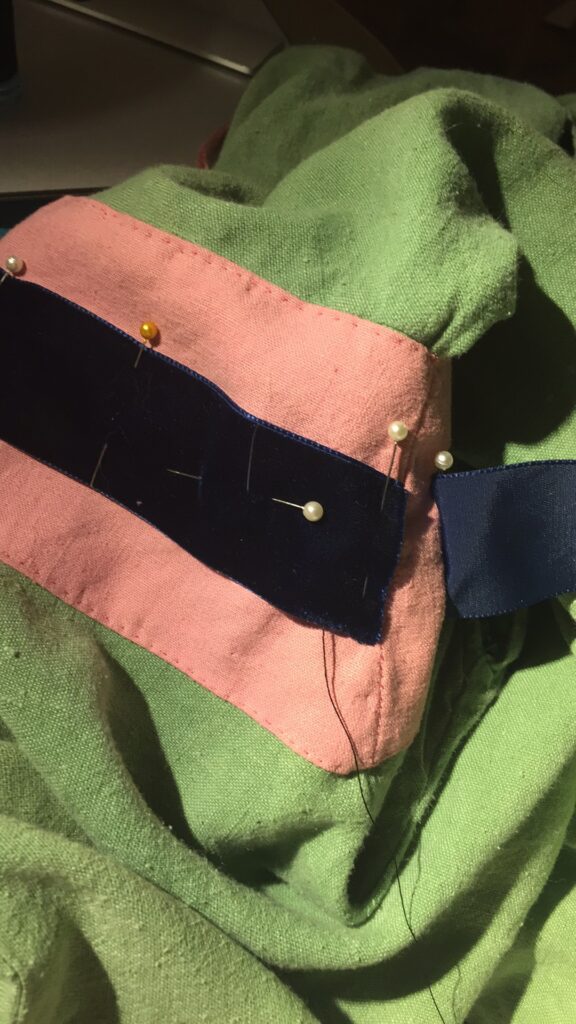
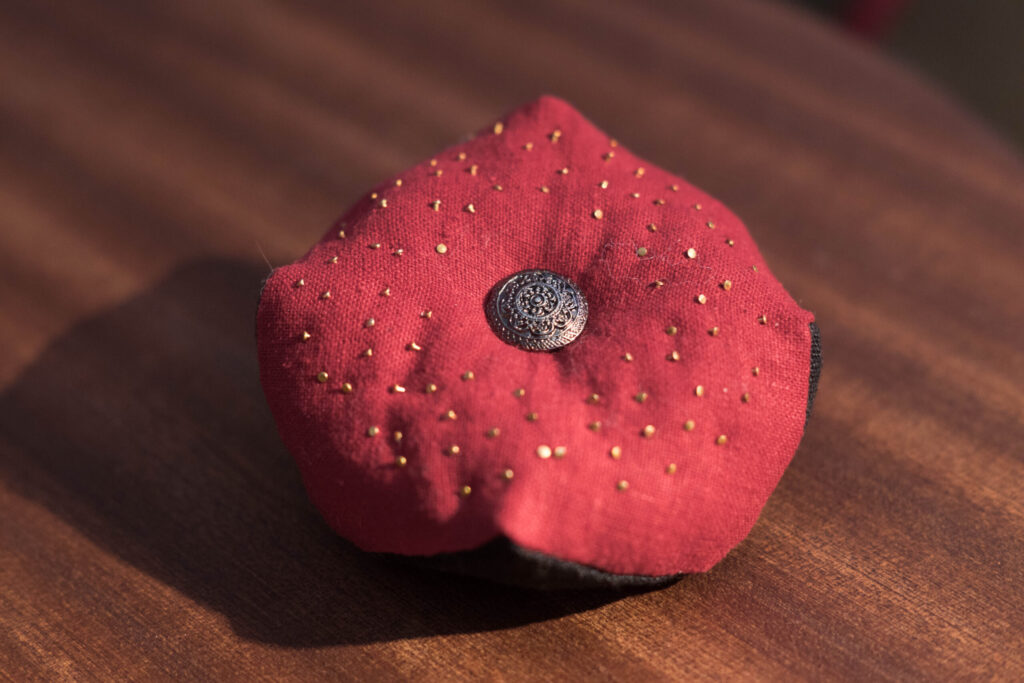
My Linen Biscornu

When I went to Gulf War this year (or as they’re calling it now: Gulfnado), I lost my needle book somewhere on the drive. I was terribly upset, considering it held all my reproduction clothing pins, and needles, as well as the brass pins I use for hand sewing. When I got home, I replaced them all, but I had to come to terms with the idea that I was trying to make a multi-tasker out of a uni-tasker. I can’t put pins and needles in the same tool. Needle books are crappy choices for pins because you have to stop and carefully replace the pin instead of just stabbing it in and carrying on. And pincushions are crappy places to put needles because they just get lost inside. So I decided to start using a pincushion I had laying around to see if I liked the arrangement better. And I did!
Linen Biscornu

Eventually though, it was clear that the cushion I was using wasn’t going to cut it. It was a quilting cotton that had a pattern on it which made the pins hard to see (and wasn’t remotely period looking), and it was stuffed with poly-fill which I am not a fan of, because it is bouncier than I like and makes a weird squeaking feeling when I use it. I’m not sure that makes sense when I write it, but it’s true.

Linen Biscornu

I happened to have some scraps of linen (in my colors, of course) and some minimally processed cotton fiber (note: I actually changed this out for fully processed cotton roving, since the pins kept catching on the bits of plant debris) and a lone button. Since this was just a quick project, I went ahead and hand sewed it with silk Gutermann thread, in a back stitch. Linen Biscornu I went with a biscornu arrangement, which is when you sew two squares together offset, so that the order of one square is in the middle of the other square’s side. The tutorial I referenced can be found here. I clipped the straight sides where they met the corners, just to give it a little ease while I was sewing.  Linen Biscornu I pinned the last seam allowanced back and stuffed the cushion full of cotton, making sure to get the corners well packed.
Linen Biscornu

Then I sewed the last side shut with a simple blind stitch (it’s actually the neatest looking of all the sides; I should have taken smaller back stitches. Linen Biscornu

Then I added the button and voila! Pin cushion!
Linen Biscornu

Here’s a slightly better shot where you can see the zig-zag seam on the side. I love how crisp it looks. Linen Biscornu

It’s not a real cushion without pins. Poppet wanted to help so I let her put the pins in…. which lasted for about two minutes. I finished up for her. Linen Biscornu Such a happy cushion, with all my brass pins. Linen Biscornu Right now I just have my needles on a piece of felt pinned to the bottom of the biscornu. But I plan to make an actual needle-book with grey felt. I may attach it to the pincushion; I haven’t decided yet whether the convenience of having them attached will outweigh the annoyance of them being fiddly. Linen Biscornu

In Progress: Cecilie’s Bliaut

Not exactly SCA related, but sort of tangentially appropriate. My friend Cecilie works at Sherwood Forest Faire here in Austin, and she commissioned me to make her a 12th century bliaut with pendant sleeves, like this one that Racaire made. She bought a lovely blue linen in herringbone twill, and instead of taking time away from her body schedule to embroider the collar and armbands, opted to go with a beautiful blue and gold synthetic brocade.
It's that time of year again.

Although polyester brocade is famously difficult to work with, it was in fact easier than this ridiculously slithery linen. SO MUCH BIAS STRETCH. I was lucky to have vertical lines where the herringbone meets to be able to cut accurately one way. (Bran thinks the whole thing is much better served as a cat bed anyway).
Cecilie's Bliaut The look of this fabric is so gorgeous though. It’s worth it. Almost. I finally learnt the trick of cutting it, which was to make all the vertical cuts and swish the linen kind of up in the air, letting the cut edge settle on its own parallel to the straight edge of my table, and then cut the horizontal lines after that. I am SO GLAD for rectangular construction in bliauts. Cecilie's Bliaut

The neckline is a slit faced in brocade and then topstitched (well-behaved it might be, but this brocade still doesn’t want to iron flat) down. I’d thought about couching some faux gold thread over the top stitching, but it disappears against that lux fabric.

Cecilie's Bliaut Current progress: Sleeves and gussets attached, neckline faced, side gores added. I still have to add the armbands at the elbow seam, but I want to make sure I don’t have to shorten the sleeves first. Then the center front and back gores will be inserted and the sides of the torso will be taken in while the dress is on Cecilie, to ensure the best fit. I’m excited to see it on her!

Cecilie's Bliaut

2015 Wrap Up

It’s a new year! While I am usually overwhelmed by possibility and eager to start the new year’s projects, this past year has ended on a difficult note for me, personally. I am having a hard time being excited about 2016 and what it will bring. I want to take a minute or two to look back at my finished projects for 2015.

Head CLoth

Embroidered Head Cloth for Dena:  A quick and sweet little embroidery/handsewing project for a friend, with elements of her heraldry on the back.

Sabina's Court Barony Scroll

Court Barony Scroll for Sabina: A tongue in cheek, fun scroll for a friend’s Court Barony. My first real scribal commission. The first time I’ve ever deliberately defaced my scribal work.

Prick and pounce tutorial, for Opuselenae.com

Prick and Pounce Tutorial: I’m counting this as a project because I feel strongly about the roll of tutorials and sharing knowledge in educating people. Still my favorite way to transfer patterns.

Rabbit's Lion Scroll

Rabbit’s Lion Scroll: First time really experimenting with pigments treated in a period manner, first (semi-successful) gilding on a scroll.

Red Crow Cup Cover

Badge Cup Cover: My heraldry passed, and now I want to put my badge on ALL THE THINGS. Starting with this cup cover, that attaches to my goblet stem so I don’t lose it.

Dragon Pouch

Dragon Pouch Collaboration: A fun little thing I did with my friend Lia to sponsor a fighter in a tournament where the buy-in was an item made by an artisan (or two!).

invites

Queen’s Champion Invitations: Last minute call to make pretty invites for an event.

The embroidered pouches are all finished!

Cantigas de Santa Maria Pouches (and part two): An artisan trade with a friend, based on two pouches from a medieval manuscript.

C&T

Cut and Thrust Championship Scroll: A kingdom-level award scroll based on a renaissance fencing manual plate.

These aren’t all the projects I’ve don’t this year, but they are all the ones I’ve blogged about.

Sewing Red Hose

I blogged about these red hose in progress, but I need to do a completed project post for them and the ginger version.

roman

I made myself a beautiful Roman outfit.

achievement The write up for this ridiculous scroll is coming. I promise. It may be two or three entries long. It was a monster.

My maiolica plate, finally fired. Only a year after I painted it! Fingers crossed that this one won't break; third times the charm, right?

Finally managed to fire this plate (third time’s the charm, right?) It lives on a shelf high up and away from danger.

poem

Calligraphed a poem for a very dear friend.

heraldry

Worked hard on learning to be a proper heraldic artist.

??

Wrote out the calligraphy for the invitations to our Baronial fall event.


collar

Finished this monstrous endeavor. It ended up being shorter than I thought it needed to be initially, which made me cry, but it turned out okay in the end. Write up coming.

veil

Made a 14th century frilled veil. That I kind of hate and want to remake.

kintsugi

Practiced the Japanese art of Kintsugi.

garter

Made a pair of garters for my friend Cecilie.

callig

Calligraphed this award, which is not for the SCA (but still looks amaze!)

All in all, it’s been a productive year. I think I’ve missed a couple things, actually. Next up will be discussion of some projects I’m hoping to accomplish this coming year, and some changes I’ll be making to the site. Happy New Year, everyone!

Cantigas de Santa Maria Pouches, Part Two

When last we left our project, I’d finished up the embroidery on the first pouch, and I’d sketched out the diamonds on the yellow linen (the last of the linen from my Byzantine dress [have I seriously not blogged that either?! What is WRONG with me?], except for what I’ve held back for lining the cuffs, whenever they get finished).  . Digression aside, I basically marked equal spaces along each edge and connected them, leaving me with a lovely diamond grid to embroider.   . I only did one line of chain stitch. Since the overall motif was much denser than the other pouch, I didn’t think it needed bolder lines. Here it is all finished, ready to be sewn up.  . I lined both pouches (but forgot the take pictures) with coordinating linen by laying the pieces right sides together and machine sewing at the seam allowances. I clipped the curve of the cover flap and then turned them right side out and pressed, not unlike the Double Eagle Pouch I made some time ago. But that braided finish is a pain in the neck, and I kind of hate doing it, no matter how fantastic it looks.  . So instead, what I decided to so was whipstitch the pouches closed with a thread that matches the outer fabric, so as not to be so noticeable, and then just do a decorative chainstitch along the edges of the join, to mimic the braid stitch without all the fuss. I did this on the dragon pouch too (technically after these were done, but I did blog that one first), because I really liked the effect.  Finishing up the edges of the pouch with chain stitch. I added long shoulder straps in the lining fabric, as shown in the manuscripts. The strap ends were doubled over to create a smaller footprint when attached to the pouches. The red ones were sewn to the back, and the blue ones were inserted into the pouch and sewn to the lining. I’m really pleased with the way they came out and I want to make a million more of them.  The embroidered pouches are all finished!

And the chest that Juan Carlos made for me? It’s beautiful! IMG_1714

Bliaut Modifications

A friend of mine, Mariana, gave me a whole bunch of her old garb. Which is so sweet, but seeing as she’s more than half a foot shorter than me, there needed to be some modifications made. This particular piece, a Spanish bliaut, is a lovely shade of sea-glass green, with navy blue velvet ribbon trim. I had some linen I had dyed a soft dusty rose pink, and decided to use it as a guard on the bottom, and to make arm bands to tie in that color to the rest of the dress. bliaut sleeve 1

I centered some leftover velvet ribbon in the bands as well, for some added visual interest. You can also catch a glimpse of the pink cord I finger looped for the side lacing too.
bliaut arms 2

This picture is ridiculously orange, but you can see the drape of the guard. It doesn’t follow the flare of the dress, but instead hangs straight down from the hem, so it looks funny hanging like that, but it’s not something that’s terribly noticeable when I’m wearing it.
finished bliaut1

Here the colors are truer, and you get a glimpse into the wreckage that is my work room. The bags are gone; I’d just culled my yarn stash and they were waiting to go away, and the rest of the detritus has been put away. I’ll try to get some pictures of me wearing it soon. finished bliaut 2

In Progress: New Red Hose

This weekend, and next week, I am from home on a trip. I hesitate to call it a vacation, as we are, this weekend, in Maryland for Edmund’s grandmother’s funeral (ave, Atlantia!). Next week we will be back on schedule for happy Thanksgiving visitation plans though, which should be more joyous.

One of the things I wanted to work on this year was the creation of some more foundational pieces for my wardrobe. Would you believe I only have one pair of hose? So on Monday, gearing up for a week and a half absence, I cut out two pairs of linen hose to handsew on the trip. Yeah, I’ve also had the hand sewing bug lately. I was going to make a woolen hood for a friend, but I didn’t have enough fabric. It will show up as a pair of warm sleeves instead, embroidered with some of the woolen embroidery thread I hand-dyed a while ago.

The first is this pair of lovely crimson hose (the other is a pair of tawny-ginger colored ones). I am sewing the long seams with a tiny backstitch for quickness and strength. Believe it or not, it’s actually just as quick for me to sew backstitch as running, and I find it’s a sturdier seam. I’m using Gutermann silk sewing thread and a short, skinny quilting between for a needle.  Sewing Red Hose

When the seams are finished, I flat fell them to keep the raw edges of the linen from unraveling. Having had a doublet I made completely fray apart at the seams, I am fanatical now about finishing techniques. I cut one side of the seam allowance down by half, and fold the taller side over it, and then fold flat and whip stitch it down. It makes for a really sturdy, strong seam.
Sewing Red Hose

The linen, cut on the bias, makes for a lovely flat seam, even along curved seams like the instep.
Sewing Red Hose

I mistakenly managed to flat fell one of the seams so that the “ugly” side of the backstitch shows, but I don’t think it’s going to structurally impact the way the hosen wears, so I’m not worried about it.
Sewing Red Hose I’ve managed to finish one of the hosen so far (The top is hemmed with a running stitch; I forgot to grab a picture of it), and I’m looking forward to working on the next. I think my favorite part about these hose is that, combined with those garters I wove a while ago (that first picture shows the only other pair of hose I have, incidentally), they’re my colors!
Sewing Red Hose

Dragon Pouch

Ave, everyone! I know, it’s been a bit since I’ve written. Life got busy. But I thought I’d take a minute and post about a little collaboration project I did with my friend Lia. Our local Barony had its fall event over Halloween weekend. One of the fun things that happened was that every fighter that wished to compete int he Championship tourney had to be sponsored by an artisan, who was in turn required to make a small thing to add to the prize baskets. Lia enjoys embroidery and she and I agreed to collaborate to sponsor a fighter with an embroidered belt pouch.

She told me in advance how big the dragon would be (about 1.5×2.5 inches) and I didn’t want the pouch to overwhelm the tiny embroidery, so I decided to make it the perfect size to hold a cell phone on a belt. I know many people have issues with modern tech being visible, but I know too many people who NEED to have them handy. My friend Helene uses her mobile to monitor her diabetic son’s blood sugar levels.
pouch1

I measured some linen in coordinating colors against my own phone, leaving a rounded fold-over flap , and then appliquéd the embroidered dragon to the outer layer.  pouch2 And finished off the edges with a quick chain stitch border. pouch3 Then I sewed the outer fabric and lining together with right sides facing each other, and turned the pouch right side out, and ironed everything. Oh gosh, I need a new ironing board cover. At this point, I also added a loop on the back to thread the belt through. I forgot to take pictures of it, but it’s a very simple belt loop.
pouch4 I whip stitched the edges of the pouch together, and then finished it with a chain stitch along the side. The inner edge and the flap were finished with a simple running stitch. Et voila, a lovely cell phone belt pouch. I liked collaborating with Lia on it, and I am excited to do some more joint projects in the future.
pouch 5

Embroidered Head Cloth

A friend of mine, Dena, approached me a while ago, asking if I would make her a forehead cloth. I think she was thinking about it just being a triangular linen cloth, but of course I couldn’t let it go just at that.
cloth1

I hand-hemmed all the edges with a plain running stitch, and added a herringbone stitch to the front edge. I kept all of the embellishment stitches in white, to keep things subtle, and not visible should she choose to wear a veil over it.

cloth2

I also added an heraldic element from her coat of arms: A St James cross at the lower point in split stitch. I fingerlooped some ties and voila! All finished. All the embroidery thread was DMC Perle Cotton, in size 8.

cloth3

Teal and Orange Bliaut

I finished the teal and orange bliaut. Did I even talk about it here? God, I’m such a bad blogger. Okay, so my friend Cecilie is doing a vow renewal this coming spring, at our local Renaissance Festival, which is Robin Hood themed. So she wants everyone to be dressed in 12th century garb. Since I’m to stand with her as her maid of honor, I needed a dress. And when our Fall Baronial event theme was announced as Legends of the Third Crusade (read: Robin Hood) I knew I had to make a dress for it.

Cecilie and Me. You can see the neckline in this post, which was made by the simple expedient of a slit cut down the center of the dress. It messes with the shoulder/upper arm portion of the dress in a way I hadn’t anticipated, moving everything farther down the shoulder. I love the V it makes, though.

1380047_10101481678027358_1965843795_n

Me all kitted up. I’m wearing a half-cirle wimple underneath my usual oval veil. I kind of love the way it looks. And the colors. And the bit of gathering at my stomach. I need a longer belt to wear with it, though.

1374717_10201261225145275_444749098_n

A decent picture of my whole silhouette. I got told several times that I looked authentic, which was the best compliment ever. You can see that I’m wearing my basic white smock that I wear under everything. It’s the most versatile piece of clothing I own.

1392048_10201261019780141_458336378_n

A good shot of the side lacing. The torso isn’t lined, just faced at the collar and the side openings. The eyelets are deliberately placed far apart so that the excess length gathers on my stomach. The only part of the dress that’s lined is the bell part of the sleeves.

1402408_10201279187914333_575197455_o

Embroidery tests for my bliaut collar. Not I need to get on my embroidery. There will be an embroidered collar and bands around my biceps. I did a couple tests for colors, and I’m liking the green-and-purple swatch best.

IMG_3550