Cantigas de Santa Maria Pouches, Part Two

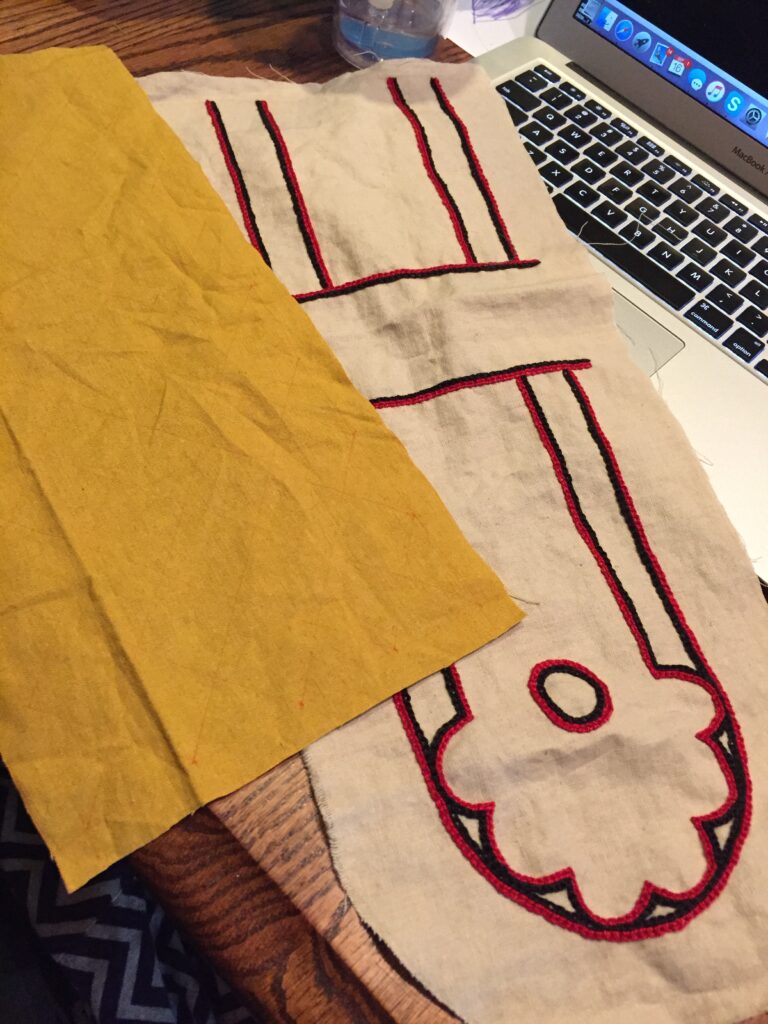
When last we left our project, I’d finished up the embroidery on the first pouch, and I’d sketched out the diamonds on the yellow linen (the last of the linen from my Byzantine dress [have I seriously not blogged that either?! What is WRONG with me?], except for what I’ve held back for lining the cuffs, whenever they get finished).  . Digression aside, I basically marked equal spaces along each edge and connected them, leaving me with a lovely diamond grid to embroider.   . I only did one line of chain stitch. Since the overall motif was much denser than the other pouch, I didn’t think it needed bolder lines. Here it is all finished, ready to be sewn up.  . I lined both pouches (but forgot the take pictures) with coordinating linen by laying the pieces right sides together and machine sewing at the seam allowances. I clipped the curve of the cover flap and then turned them right side out and pressed, not unlike the Double Eagle Pouch I made some time ago. But that braided finish is a pain in the neck, and I kind of hate doing it, no matter how fantastic it looks.  . So instead, what I decided to so was whipstitch the pouches closed with a thread that matches the outer fabric, so as not to be so noticeable, and then just do a decorative chainstitch along the edges of the join, to mimic the braid stitch without all the fuss. I did this on the dragon pouch too (technically after these were done, but I did blog that one first), because I really liked the effect.  Finishing up the edges of the pouch with chain stitch. I added long shoulder straps in the lining fabric, as shown in the manuscripts. The strap ends were doubled over to create a smaller footprint when attached to the pouches. The red ones were sewn to the back, and the blue ones were inserted into the pouch and sewn to the lining. I’m really pleased with the way they came out and I want to make a million more of them.  The embroidered pouches are all finished!

And the chest that Juan Carlos made for me? It’s beautiful! IMG_1714

Cantigas de Santa Maria Pouches, Part One

For a while now, I’ve been wanting a six board chest, in which to keep my feast gear and other sundries at events. I have resigned to myself to the fact that I don’t have time to do all the things I want to do. And even more importantly, I don’t have to do the things I don’t have any interest in doing, even when the outcome of those activities is a thing I want or need. I am not a wood worker, and I don’t really want to cultivate those skills right now. So I put out a call-out to my reenactment friends, to see if any of them would be interested in doing an artisan trade.

Master Juan Carlos, a Laurel in my local Barony, let me know that he’d be willing to make a chest for me (I’d already seen and admired one that he made for himself, so I was excited) in exchange for a couple of embroidered pouches similar to those from the Cantigas de Santa Maria. I looked through the illuminations he sent me and settled on two designs. One like this, with a pouch flap and a neat rounded motif…

cantiga-maria-1

And one like the yellow ones below, with no flap and a diamond design.  cantiga-maria-2 I picked out my colors (red and black on natural linen, and indigo blue on yellow) and sketched out my designs on the fabric. I decided to go with DMC Pearl Cotton, since I have a metric ton of it, it launders well (I try not to use delicate fibers unless I know who they are going to), and makes a nice bold clean line.
New handwork project, for Master Juan Carlos.

I decided on chain stitch, as it makes the boldest line with a single row of stitching, and the designs are all linear. I also started off using a hoop, but gave it up as I found it was more trouble than it was worth. This red and black design has the flap motif incorporated into the back; the pouch flap will fold over at the top of that line, halfway through the circle.
Working on my embroidery art trade tonight.

The pouch laid out, so you can see basically what it will look like when it’s all folded up.
. . . I finished up all the red, and then began the black, just embroidering another line right next to the one that had already been done.
.

I really like how they look together; so bold and graphic.
.

All finished up with the first embroidery, about to start on the second. Part two will be the second pouch embroidery and how I made them all up. Tune in Monday!

.

Eagle Pouch: Completed

I know, I know. I promised a run-down of the fox embroidery. But i realized that I have two projects that need to be wrapped up first. The biggest one is the Double-Headed Eagle pouch. This was embroidered as a Christmas present for a friend (and only finished 7 months late). It’s worked in long-and-short stitch, in black DMC cotton floss (three strands at a time), on linen, and outlined in couched DMC silver thread. The eyes are silver beads.

Double Eagle Pouch

Double Eagle Pouch

The loop and drawstring are fingerloop braids (round braid of five loops, I think) done in black and grey pearl cotton. The drawstring goes through seven hand-sewn eyelets on each side, and is separate from the belt loop so you don’t have to fuss with the hanging strap to get into the pouch (I hate that).

Double Eagle Pouch

Double Eagle Pouch

Double Eagle Pouch

The pouch is lined in natural linen for a finished look, and so nothing in there snags on the embroidery back. The sides of the pouch are finished in a looping braid-like finish that I learned from the fantastic Racaire. I’m really proud of how this project turned out. And I can’t wait to see the look on Marc’s face when I give it to him.

Double Eagle Pouch