Remember when I went to KWHSS and took classes on gesso and gilding? Well, I thought I’d try it at home to see if it worked as well as I hoped (hint: it didn’t).
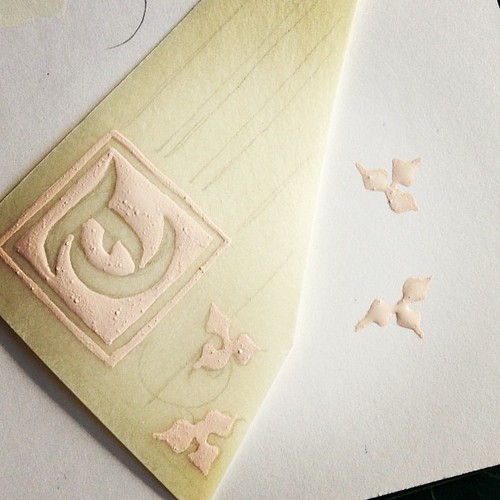
I reconstituted the mostly-dried gesso unto a thin paste and painted up some pretty leaves and an illuminated letter. The off-white is sheep parchment, the white is bristol board.
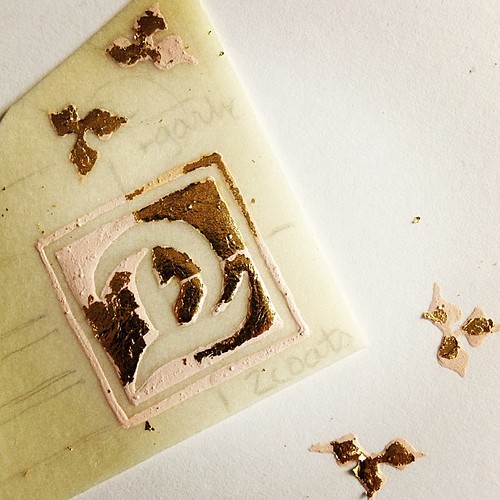
 In my haste, I didn’t smooth out any of the gesso, so the fake gold leaf didn’t stick very well at all. I am given to understand that the fake gold doesn’t much like to stick to anything. Also, the gesso didn’t re-hydrate very well either, even after nine or ten deep breaths. Normally a couple of deep breaths blown open-mouthed (my friend Penny says she likes to pretend she’s Aslan) onto gesso has just enough moisture in it to make the surface tacky, so the gold will stick.
I tried another layer of gesso (bottom right corner as we look at the above picture) and some garlic extract (top right corner), and while the situation improved, it wasn’t totally successful. Then Cat, the lady who taught the gesso class, told me I should really smooth out the gesso, as all the lumps and bumps create spaces that the gold leaf can’t get into to stick.
I tried it out and it worked like a dream. It’s still a little rough around the edges, but still. Improvement.


